admin1
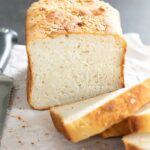
Fresh homemade gluten-free bread can be soft, flavorful, and wonderfully satisfying when prepared with the right ingredients and techniques. Unlike traditional wheat bread, gluten-free dough relies on a combination of specialized flours and natural binders to create a loaf with a tender crumb and excellent structure. This recipe is designed for both beginners and experienced home bakers, offering step-by-step instructions that make achieving bakery-style results much easier.
Whether you enjoy your bread for breakfast toast, sandwiches, or alongside soups and salads, this recipe creates a loaf that stays soft, slices beautifully, and stores well for several days.
Why You’ll Love This Recipe
This gluten-free bread is made with a balanced flour blend that provides a light texture without becoming dry or crumbly. Psyllium husk and xanthan gum work together to replace gluten, helping the dough rise properly while creating a flexible, sliceable loaf. The addition of oat flour and a small amount of oil improves moisture, resulting in bread that remains soft even after cooling.
Recipe Highlights
- Soft and fluffy texture
- Easy-to-follow method
- Great for sandwiches and toast
- Dairy-free option available
- Freezer-friendly
- Beginner-friendly
- Delicious fresh or toasted
Makes
- 1 standard loaf
- About 10 to 12 slices
Ingredients
Dry Ingredients
- 2 cups gluten-free all-purpose flour blend
- ½ cup oat flour
- ¼ cup tapioca starch
- 1 teaspoon xanthan gum
- 1 tablespoon psyllium husk powder
- 2 tablespoons granulated sugar
- 1 teaspoon salt
- 2 teaspoons instant yeast
Wet Ingredients
- 1½ cups warm water (about 105–110°F or 40–43°C)
- 3 tablespoons vegetable oil or olive oil
- 1 teaspoon apple cider vinegar
- 2 tablespoons plain yogurt or milk (optional)
Equipment
- Large mixing bowl
- Measuring cups and spoons
- Whisk
- Stand mixer or hand mixer
- Loaf pan (8×4-inch or 9×5-inch)
- Rubber spatula
- Kitchen towel or plastic wrap
- Cooling rack
Instructions
Step 1: Activate the Yeast
Pour the warm water into a bowl and stir in the sugar until dissolved. Sprinkle the instant yeast over the surface and allow it to sit for 5 to 10 minutes. A layer of foam indicates that the yeast is active and ready to use.
If no bubbles appear, the yeast may be expired or the water temperature may not be suitable. Starting with fresh yeast is essential for a well-risen loaf.
Step 2: Mix the Dry Ingredients
In a separate large bowl, combine the gluten-free flour blend, oat flour, tapioca starch, xanthan gum, psyllium husk powder, and salt. Whisk the ingredients together for about 2 minutes to distribute everything evenly.
This step is important because evenly mixed binders help create a consistent texture throughout the bread.
Step 3: Prepare the Wet Mixture
Add the oil, apple cider vinegar, and yogurt or milk, if using, to the activated yeast mixture. Stir until fully combined.
The vinegar helps strengthen the dough, while the oil keeps the finished loaf tender.
Step 4: Mix the Dough
Gradually pour the wet ingredients into the bowl of dry ingredients. Using a stand mixer fitted with a paddle attachment, mix on medium speed for 3 to 5 minutes.
Unlike traditional bread dough, gluten-free dough will be thick and sticky rather than smooth and elastic. It should resemble a very thick batter. If it appears too dry, add one tablespoon of water at a time. If it seems too thin, sprinkle in a small amount of gluten-free flour blend until the consistency is correct.
Step 5: Rest the Dough
Allow the mixed dough to rest for 5 to 10 minutes.
During this time, the psyllium husk absorbs moisture and forms a gel-like structure that improves the dough’s strength and texture. This brief resting period also allows the flours to hydrate completely, making the finished bread softer.
Step 6: Transfer to the Pan
Lightly grease the loaf pan with oil or nonstick spray.
Transfer the dough into the prepared pan and smooth the top with a damp spatula. Slightly rounding the surface encourages an attractive domed loaf during baking.
Step 7: Let the Dough Rise
Cover the loaf pan loosely with plastic wrap or a clean kitchen towel.
Place it in a warm, draft-free location for 30 to 60 minutes, or until the dough has noticeably expanded. It does not need to double in size, but it should appear puffed and airy.
Avoid allowing the dough to overproof, as gluten-free breads can collapse if they rise too much before baking.
Step 8: Bake
Preheat the oven to 350°F (180°C).
Place the loaf on the center rack and bake for 35 to 45 minutes. If the top begins browning too quickly, loosely cover it with aluminum foil during the final portion of baking.
A fully baked loaf should have a golden crust and an internal temperature of approximately 203°F (95°C). It should also sound hollow when gently tapped on the bottom.
Step 9: Cool Completely
Remove the bread from the oven and carefully lift it from the loaf pan.
Place it on a wire rack and allow it to cool for at least 1 to 2 hours before slicing.
Cooling is an important step because the internal structure continues to set as steam escapes. Cutting the loaf while it’s still hot may result in a gummy texture.
Step 10: Slice and Serve
Once completely cool, use a serrated bread knife to cut even slices.
Enjoy the bread fresh with butter, jam, nut butter, avocado, or your favorite sandwich fillings.
Tips for the Best Results
- Measure ingredients accurately for consistent texture.
- Use fresh yeast for reliable rising.
- Do not skip the psyllium husk or xanthan gum, as both improve structure.
- Avoid adding too much extra flour, which can make the loaf dense.
- Allow the bread to cool fully before slicing.
Flavor Variations
Seeded Bread
Stir in ¼ cup each of sunflower seeds, flaxseeds, or sesame seeds for extra texture and nutrition.
Herb Bread
Mix garlic powder, dried oregano, rosemary, thyme, or Italian seasoning into the dry ingredients for a savory loaf.
Cinnamon Raisin Bread
Add 1 teaspoon ground cinnamon and ½ cup raisins for a lightly sweet breakfast bread.
Dairy-Free Version
Replace the yogurt with additional warm water or your favorite unsweetened plant-based milk.
Storage Instructions
Store the cooled loaf in an airtight container or bread bag at room temperature for up to 3 days.
For longer storage, refrigerate for up to one week. Toasting refrigerated slices restores much of their original texture.
To freeze, slice the loaf first and place parchment paper between slices before storing them in a freezer-safe bag. Freeze for up to 2 months. Reheat slices directly from frozen in a toaster or warm oven.
Troubleshooting
Bread is dense: This can happen if the yeast is inactive, too little liquid is added, or the dough is not mixed long enough.
Bread is gummy: The loaf may be underbaked or sliced before it cooled completely. Bake until the center reaches the proper temperature and always allow sufficient cooling time.
Bread crumbles easily: This usually indicates insufficient binders or overly dry dough. Double-check measurements and avoid adding excess flour.
Loaf collapsed after baking: Overproofing or adding too much liquid can weaken the dough structure. Allow the dough to rise only until slightly puffed.
Serving Ideas
This soft gluten-free bread is incredibly versatile. Enjoy it toasted with butter and honey for breakfast, use it to make sandwiches for lunch, serve it alongside soup or salad for dinner, or transform leftover slices into French toast, garlic bread, or homemade breadcrumbs.