 admin1
Introduction
Turkish bread is famous for its soft texture, golden crust, and deliciously simple flavor. Whether you serve it with kebabs, grilled chicken, soups, salads, hummus, or your favorite curry, freshly baked Turkish bread can make an ordinary meal feel special. The best part is that you do not need a traditional oven or a professional bread-making setup to enjoy it at home.
With this air fryer Turkish bread recipe, you can prepare beautifully soft, fluffy flatbreads with a lightly crisp exterior using simple ingredients you probably already have in your kitchen. The air fryer makes the cooking process convenient, especially when you want fresh bread without heating a large oven.
This recipe is designed for home cooks, including beginners who have never made bread from scratch. You will learn how to prepare the dough, knead it properly, allow it to rise, shape the bread, and cook it in the air fryer without drying it out.
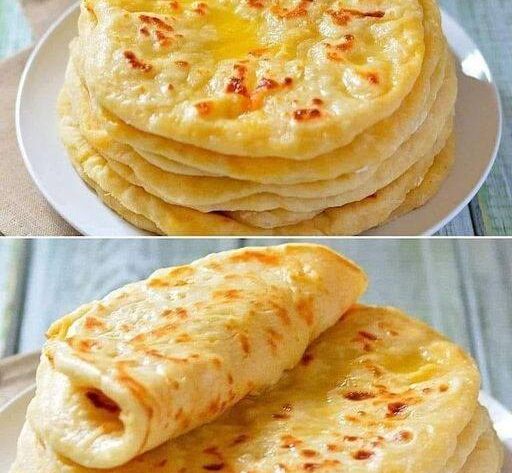
The result is a delicious homemade bread with a tender center and a lightly golden surface. You can brush it with garlic butter, sprinkle it with sesame seeds, or keep it plain for everyday meals.
One important thing to remember is that Turkish bread comes in different styles. This recipe makes a soft, slightly puffy Turkish-style flatbread inspired by traditional Turkish breads such as bazlama and pide. Because air fryers vary in temperature and airflow, the cooking time may need a small adjustment depending on your appliance.
Recipe Overview
- Preparation time: 20 minutes
- Dough rising time: 60–90 minutes
- Second resting time: 10–15 minutes
- Cooking time: 12–20 minutes per batch, depending on the size of your air fryer and the thickness of the bread
- Total time: Approximately 1 hour 45 minutes to 2 hours 30 minutes
- Difficulty level: Easy
- Serving size: 6 small flatbreads
- Cuisine: Turkish-inspired
- Cooking method: Air frying
These flatbreads are best served warm, straight from the air fryer. However, they can also be cooled, stored, and reheated when needed.
Ingredients for Air Fryer Turkish Bread
The ingredients are simple, affordable, and easy to find. Accurate measurements help you achieve a soft dough that is easy to shape and cooks evenly.
For the bread dough
- 3 cups all-purpose flour, approximately 375 grams
- 1 cup warm water, approximately 240 millilitres
- 2 teaspoons instant yeast, approximately 6–7 grams
- 1 tablespoon sugar
- 1 teaspoon salt
- 2 tablespoons olive oil or neutral cooking oil
- 2–4 tablespoons additional flour, only if needed for shaping
The amount of additional flour will depend on the moisture in your flour and the humidity in your kitchen. Avoid adding too much because a dry dough can produce firm, heavy bread.
For brushing the bread
Choose one of the following options:
- 1–2 tablespoons olive oil for a simple, traditional flavor
- 2 tablespoons melted butter for a richer taste
- 2 tablespoons melted butter mixed with 1 minced garlic clove for garlic bread
- 1 tablespoon olive oil mixed with 1 teaspoon sesame seeds for a lightly nutty finish
Optional toppings
You can customize your Turkish bread with:
- White sesame seeds
- Nigella seeds, also known as kalonji
- Chopped fresh parsley
- Dried oregano
- A small pinch of flaky salt
- Minced garlic mixed with melted butter
Use only a small amount of topping. Heavy toppings may fall off during cooking, and loose ingredients can brown quickly in the air fryer.
Equipment You Will Need
You do not need any specialized baking equipment.
Prepare the following items before you begin:
- An air fryer with a basket or suitable tray
- A large mixing bowl
- A measuring cup and measuring spoons
- A clean work surface
- A wooden spoon or spatula
- A clean kitchen towel
- A rolling pin, although your hands are enough
- A pastry brush or the back of a spoon
- Parchment paper specifically rated for air fryer use, if needed
Check the dimensions of your air fryer before shaping the bread. Small flatbreads are easier to cook evenly because they leave enough room for hot air to circulate.
Never cover the entire basket with parchment paper in a way that blocks airflow. If using parchment, make sure it is secured beneath the food and follow your appliance manufacturer’s safety instructions. Do not place loose parchment in a preheating air fryer.
Step 1: Prepare the Yeast Mixture
Start by measuring the warm water into a large mixing bowl.
The water should feel comfortably warm when touched, not hot. Water that is too hot can damage the yeast and prevent the dough from rising properly.
Add the sugar and instant yeast to the water. Stir gently to distribute the ingredients.
Let the mixture stand for approximately 5 minutes. Instant yeast can usually be mixed directly with the flour, so this step is not strictly necessary. However, allowing it to stand gives you an opportunity to check that the yeast is active.
If the yeast is fresh, you may notice a few bubbles or a slightly foamy surface. Some instant yeasts produce very little foam, so the absence of dramatic bubbling does not automatically mean the yeast is inactive.
If you are using active dry yeast rather than instant yeast, allow it to sit for 5–10 minutes until it becomes foamy before proceeding.
Next, add the olive oil and stir again.
Your liquid mixture is now ready for the flour.
Step 2: Mix the Dough
Add the flour and salt to the yeast mixture.
Begin mixing with a wooden spoon or spatula until the ingredients come together into a rough dough. At first, the dough may appear uneven, sticky, or slightly shaggy. This is normal.
Once most of the flour has been incorporated, use your hands to bring the dough together.
If the dough is extremely sticky and impossible to handle, add flour one tablespoon at a time. Mix thoroughly after each addition before deciding whether you need more.
Try not to add too much flour. A slightly tacky dough generally produces softer bread than a stiff dough.
If the mixture looks dry or contains loose flour that will not come together, add water one teaspoon at a time.
The ideal dough should feel soft, flexible, and slightly tacky without sticking excessively to your fingers.
Gather the dough into a ball and prepare to knead it.
Step 3: Knead Until Smooth and Elastic
Transfer the dough to a clean work surface.
Knead it for approximately 8–10 minutes by hand. Push the dough forward with the heel of your palm, fold it back toward yourself, turn it slightly, and repeat.
Continue until the dough becomes smoother and more elastic.
At the beginning, it may feel rough and uneven. As you knead, the flour absorbs the water, and gluten develops. This helps the bread hold its shape and gives the finished flatbread a pleasant, flexible texture.
If the dough sticks to the work surface, lightly oil your hands rather than adding large amounts of flour.
After several minutes, the dough should become easier to handle. It should stretch somewhat without immediately tearing.
You do not need to achieve an absolutely perfect surface. The goal is a cohesive, soft dough that can rise evenly.
If you prefer using a stand mixer, knead with a dough hook on low to medium-low speed for approximately 5–7 minutes, checking the texture as you go.
Once kneading is complete, shape the dough into a smooth ball.
Step 4: Let the Dough Rise
Lightly grease a clean mixing bowl with a little oil.
Place the dough inside and turn it once so the surface receives a thin coating of oil. This helps prevent the dough from drying out.
Cover the bowl with a clean kitchen towel, reusable cover, or lightly greased plastic wrap.
Leave it in a warm, draft-free place for approximately 60–90 minutes.
The exact rising time depends on the temperature of your kitchen and the activity of your yeast. In a warm kitchen, the dough may rise more quickly. In a cooler room, it may need additional time.
Instead of relying only on the clock, look at the dough. It should become noticeably larger and approximately double in size.
Avoid placing the bowl in excessive heat to speed up the process. Very hot conditions can damage the yeast and negatively affect the dough.
If your kitchen is particularly cold, place the covered bowl in a turned-off microwave alongside a cup of warm water. Do not switch on the microwave while the dough is inside.
Once the dough has risen, gently press it with your fingertips to release some of the accumulated gas.
The dough should feel airy, soft, and easier to stretch than it did before rising.
Step 5: Divide and Shape the Bread
Transfer the risen dough to a lightly oiled work surface.
Divide it into six approximately equal portions. For consistent cooking, try to keep each portion close to the same weight.
Shape each portion into a ball by folding the edges underneath and gently rolling it against the work surface.
Cover the dough balls with a clean towel and let them rest for 10 minutes.
This short resting period relaxes the gluten, making the dough easier to flatten without shrinking back.
After resting, take one dough ball and flatten it with your hands or a rolling pin.
Aim for a round or slightly oval shape approximately 12–14 centimetres across and about 5–8 millimetres thick.
You can make the bread thinner if you prefer a flatter result, but thinner pieces may dry out more quickly. Slightly thicker pieces are usually better when you want a soft, fluffy center.
Repeat with the remaining dough balls.
Keep the shaped pieces covered while you prepare the air fryer. This prevents the surfaces from drying out before cooking.
Do not worry if the breads are not perfectly round. Homemade Turkish-style flatbread looks appealing with its natural, slightly irregular shape.
Step 6: Preheat the Air Fryer
Preheat your air fryer to 180°C for approximately 3 minutes, provided your appliance’s instructions permit preheating.
Preheating helps the bread begin cooking immediately and can improve the consistency of the finished surface.
Some air fryers have a dedicated preheat function, while others simply require you to run the appliance briefly at the desired temperature.
If your model does not require preheating, follow its usual instructions.
Lightly brush the air fryer basket or suitable tray with oil if recommended by the manufacturer. Alternatively, use a properly sized piece of air-fryer-safe parchment paper.
Make sure the basket is not overcrowded. The bread needs space for hot air to move around it.
Depending on the size of your appliance, you may need to cook one or two flatbreads at a time.
Cooking in smaller batches generally gives you better control over browning and helps prevent the bread from becoming unevenly cooked.
Step 7: Cook the Turkish Bread
Place one or two shaped flatbreads in the preheated air fryer basket, leaving space between them.
Lightly brush the upper surface with olive oil if desired.
Cook at 180°C for approximately 4–6 minutes on the first side.
Open the basket and carefully turn the bread over using suitable silicone-tipped tongs or a spatula.
Continue cooking for another 3–5 minutes, checking the color and texture as it cooks.
The total cooking time will usually be around 7–11 minutes per batch, although thicker bread and less powerful air fryers may require additional time.
The bread should become lightly golden, with a few deeper brown spots. It may puff up slightly as steam forms inside the dough.
Avoid cooking every batch strictly according to the clock without checking it. Air fryers vary significantly in how quickly they brown bread.
If the outside becomes dark before the center is cooked, reduce the temperature to approximately 160–170°C and continue cooking in short intervals.
If the bread remains pale and feels doughy in the center, give it another minute or two and check again.
The finished bread should feel light and flexible, with a cooked interior rather than a wet or gummy texture.
Repeat the process with the remaining pieces.
Remember that the cooking time refers to each batch, not the entire recipe. If your air fryer holds only one flatbread at a time, cooking all six will naturally take longer.
Step 8: Brush With Butter or Olive Oil
As soon as the bread comes out of the air fryer, transfer it to a plate or clean board.
While it is still warm, brush the surface with olive oil or melted butter.
This small step makes a noticeable difference. The fat adds flavor, gives the crust a gentle sheen, and helps keep the bread pleasantly soft.
For garlic Turkish bread, mix melted butter with finely minced garlic and brush a thin layer over each piece.
If you enjoy fresh herbs, add a little chopped parsley after brushing.
For a more traditional seed-topped appearance, sprinkle sesame seeds or nigella seeds over the bread before cooking, pressing them gently into the surface so they adhere.
You can also keep the bread plain and allow its mild, slightly savory flavor to complement the rest of your meal.
Step 9: Keep the Bread Soft
One of the most important secrets to soft homemade flatbread is how you handle it after cooking.
As each piece finishes cooking, place it in a clean kitchen towel and loosely cover it.
Stacking the warm breads under the towel allows a small amount of moisture to remain around them. This helps soften the crust while the center stays tender.
Do not seal steaming-hot bread in an airtight container immediately, because trapped condensation can make it damp.
Allow the bread to rest for approximately 5 minutes before serving.
During this time, the interior settles, the moisture distributes more evenly, and the bread becomes easier to tear or fold.
Serve it while warm for the best texture.
If you prefer a slightly crispier crust, leave the bread uncovered for a few minutes instead of wrapping it in a towel.
Tips for Perfect Air Fryer Turkish Bread
1. Use warm, not hot, water
Water that is too hot can weaken or kill the yeast. Lukewarm water encourages yeast activity without exposing it to excessive heat.
2. Avoid adding too much flour
A stiff dough often creates dense bread. Add extra flour only when the dough is genuinely too sticky to manage.
3. Give the dough enough time to rise
A rushed dough may produce bread that is heavy and less flavorful. Wait until the dough has expanded noticeably before shaping it.
4. Roll the pieces to an even thickness
Uneven pieces can cook inconsistently. Thin areas may become crisp before thick areas finish cooking.
5. Do not overcrowd the air fryer
Air needs room to circulate. If the breads touch or overlap, they may cook unevenly.
6. Adjust the cooking time for your appliance
A compact air fryer can brown bread more quickly than a larger model. Begin checking early and make small adjustments.
7. Do not overcook the bread
Flatbread loses moisture quickly. Remove it when the center is cooked and the outside is lightly golden rather than waiting for a very dark crust.
8. Cover the bread after cooking
A clean towel is a simple way to preserve softness, especially if you are preparing several batches.
9. Use oil sparingly
A light coating adds flavor and helps with browning. Excess oil is unnecessary and can make the surface greasy.
10. Test one bread first
If you are using an unfamiliar air fryer, cook a single flatbread before preparing the rest. This helps you determine the best time and temperature for your appliance.
How to Know When Turkish Bread Is Fully Cooked
The bread should have a lightly golden exterior with a few brown spots. It should feel cooked and flexible rather than wet, sticky, or doughy in the middle.
A flatbread may puff during cooking, but puffing is not essential for a successful result.
If you cut into a piece and find a gummy center, return it to the air fryer for another minute or two at a slightly lower temperature.
If the exterior is already quite dark, lowering the temperature is preferable to continuing at high heat.
Because this bread is relatively thin, you generally do not need the same long cooking time used for a large loaf.
Delicious Ways to Serve Turkish Bread
Homemade Turkish bread is versatile enough to serve with breakfast, lunch, dinner, or snacks.
Serve it with hummus
Warm flatbread pairs beautifully with hummus. Tear it into pieces and use it to scoop up the creamy dip.
You can also serve it with baba ganoush, labneh, or a yogurt-based dip.
Pair it with grilled meat
Serve the bread alongside chicken kebabs, beef kebabs, grilled lamb, or spiced chicken. Add sliced onions, tomatoes, cucumber, and fresh herbs for a simple meal.
The soft bread is ideal for wrapping around grilled ingredients.
Enjoy it with soup
Turkish-style flatbread is delicious with lentil soup, tomato soup, vegetable soup, or creamy mushroom soup.
Its tender texture makes it perfect for dipping.
Use it for sandwiches and wraps
Allow the bread to cool slightly, then fill it with grilled chicken, lettuce, tomatoes, cucumber, cheese, or your preferred sandwich ingredients.
For a quick lunch, spread hummus over the surface and add roasted vegetables.
Serve it with curry
Although this is a Turkish-inspired recipe, the bread also works well with many South Asian dishes. Try it with chicken karahi, butter chicken, chickpea curry, or a thick lentil dish.
Its mild flavor makes it an excellent accompaniment to rich, spiced sauces.
Turn it into garlic bread
Brush the cooked bread with melted garlic butter, sprinkle with parsley, and serve immediately.
You can also add a little grated cheese after cooking and briefly return the bread to the air fryer at a lower temperature until the cheese melts.
Variations to Try
Garlic and herb Turkish bread
Mix one minced garlic clove with melted butter and a teaspoon of chopped parsley. Brush the mixture over the warm bread.
For extra flavor, add a small pinch of dried oregano.
Sesame Turkish bread
Brush the shaped dough lightly with water or oil, then sprinkle sesame seeds over the top before cooking.
Press the seeds gently into the surface so they remain attached.
Nigella seed bread
Sprinkle a few nigella seeds over each flatbread before air frying. They add a distinctive, slightly onion-like flavor that works especially well with savory dishes.
Whole-wheat Turkish bread
Replace up to half of the all-purpose flour with whole-wheat flour.
Whole-wheat flour absorbs more water and can make bread denser, so you may need to add another tablespoon or two of water. Add it gradually and judge the dough by its texture.
Yogurt Turkish bread
For a slightly richer flatbread, replace approximately 60 millilitres of the water with plain yogurt.
Add the remaining water gradually because the moisture content of yogurt varies. The dough should remain soft and kneadable.
Cheese-filled flatbread
Place a small amount of grated cheese or a mixture of cheese and chopped herbs in the center of a flattened dough portion.
Fold the edges over the filling and seal them carefully. Gently flatten the filled dough and cook it at a slightly lower temperature if the surface browns too quickly.
Make sure the filling is enclosed so that melted cheese does not leak into the air fryer basket.
Common Problems and How to Fix Them
Why is my Turkish bread hard?
Hard bread is usually caused by too much flour, insufficient rising time, excessive cooking, or leaving the bread uncovered for too long.
Next time, keep the dough soft, allow it to rise fully, and begin checking the bread early.
Covering the cooked flatbreads with a clean towel can also help.
Why did my bread not rise?
Possible reasons include inactive yeast, water that was too hot, or a kitchen that was too cold.
Check the expiry date on your yeast and make sure the water is comfortably warm. Give the dough enough time to expand before shaping it.
Why is the outside brown but the inside raw?
The air fryer temperature may be too high, or the bread may be too thick.
Lower the temperature to 160–170°C and continue cooking in short intervals. Next time, shape the bread to an even thickness.
Why is my dough too sticky?
The flour may have absorbed less water than expected, or the ingredients may have been measured differently.
Let the dough rest for 5 minutes before adjusting it. If it remains difficult to handle, add flour a tablespoon at a time or lightly oil your hands.
Avoid adding large quantities of flour all at once.
Why did my bread turn out dry?
The most likely cause is overcooking. Flatbreads are thin and lose moisture quickly in circulating hot air.
Use the recommended temperature as a starting point, check early, and remove the bread as soon as it is cooked.
Why did my bread not puff up?
Puffing depends on the dough’s moisture, thickness, shaping, and cooking conditions. Some flatbreads puff dramatically, while others develop only small air pockets.
A bread that does not puff can still be soft and delicious.
Make sure the dough has risen properly and avoid rolling it too thin if you want a fuller texture.
Storage and Reheating Instructions
At room temperature
Allow the bread to cool until it is no longer steaming. Store it in an airtight container or a sealed food-safe bag.
For the best quality, consume it within 1–2 days. In hot or humid conditions, refrigeration or freezing may be preferable, especially if the bread contains perishable fillings or toppings.
In the refrigerator
Place cooled bread in an airtight container or food-safe bag and refrigerate for approximately 3–4 days.
Refrigeration can make bread firmer, so reheating it gently helps restore a softer texture.
In the freezer
Freeze the completely cooled flatbreads in a freezer-safe bag or container for up to 2 months for good quality.
Place a small piece of parchment between individual breads if you want to remove them separately.
Label the container with the date so you can keep track of storage time.
How to reheat in the air fryer
Preheat the air fryer to approximately 150–160°C.
Place one or two flatbreads in the basket and heat for 1–3 minutes, checking frequently.
If the bread feels dry, lightly brush it with water or oil before reheating. Avoid adding too much water, as it can make the surface soggy.
For frozen bread, allow extra time and check that it is heated through.
You can also reheat the bread in a covered pan over low heat for a few minutes.
Frequently Asked Questions
Can I make Turkish bread without yeast?
Yes, but the result will be different. You can use a quick flatbread recipe made with flour, yogurt, salt, and baking powder. It will not have the same flavor or texture as yeast-raised Turkish bread, but it is a useful option when you need bread quickly.
Can I prepare the dough in advance?
Yes. You can prepare the dough, cover it, and refrigerate it for a slow rise. Depending on your yeast quantity and refrigerator temperature, it may rise slowly overnight.
When ready to cook, allow the dough to lose some of its chill before dividing and shaping it. If it has already risen substantially, handle it gently.
Can I use bread flour instead of all-purpose flour?
Yes. Bread flour usually has a higher protein content and can create a slightly chewier texture.
It may absorb water differently, so adjust the liquid gradually until the dough is soft and elastic.
What temperature is best for air fryer Turkish bread?
Start at 180°C. Cook for approximately 4–6 minutes on the first side and another 3–5 minutes after flipping.
These are starting estimates, not fixed rules. Adjust the time according to the thickness of the dough and the performance of your air fryer.
Do I need to flip the bread?
Flipping is recommended for this recipe because it helps both sides cook and brown more evenly.
If your appliance has a tray-style design or a heating arrangement that cooks both sides effectively, the results may vary. Always check the underside before deciding whether more cooking is necessary.
Can I make the bread without oil?
Yes. The dough can be prepared without olive oil, although the finished texture may be slightly less tender and the flavor less rich.
You can also omit the finishing butter or oil if you prefer a plain flatbread.
Can I make the dough by hand?
Absolutely. A mixing bowl, spoon, and clean work surface are all you need. Knead by hand until the dough becomes smooth and elastic.
Is air fryer Turkish bread the same as traditional Turkish pide?
Not exactly. Traditional Turkish pide often has a distinctive shape and may be prepared using a different dough, shaping method, and oven temperature.
This recipe is a practical Turkish-inspired flatbread designed for home air fryers. It delivers a similarly appealing combination of softness, gentle browning, and savory flavor without requiring a traditional bread oven.
Nutritional Information
The following values are rough estimates for one of six flatbreads, assuming the entire dough is divided evenly and the recipe uses the listed flour, sugar, oil, yeast, and salt.
- Calories: Approximately 240–270 per flatbread
- Carbohydrates: Approximately 40–45 grams
- Protein: Approximately 6–8 grams
- Fat: Approximately 4–6 grams
- Fiber: Approximately 1–2 grams
Actual nutritional values depend on the flour brand, the amount of oil absorbed, the size of each flatbread, and any butter, cheese, or other toppings added.
These estimates are intended as general guidance rather than precise dietary calculations.
Final Thoughts
Making Turkish bread in an air fryer is a convenient way to enjoy warm, homemade flatbread without using a conventional oven. With a handful of basic ingredients, a little patience, and a few simple techniques, you can create bread that is soft inside, lightly golden outside, and versatile enough to accompany almost any meal.
The most important steps are to keep the dough soft, knead it until elastic, give it sufficient time to rise, and avoid overcooking it. These details have a greater effect on the final result than complicated ingredients or specialized equipment.
If this is your first attempt, cook one flatbread as a test and adjust the time according to your air fryer. Once you understand how quickly your appliance cooks the dough, the remaining batches become much easier.
Serve the bread warm with hummus, grilled meat, soup, curry, or a simple garlic butter topping. You can also freeze extra portions and reheat them whenever you want fresh-tasting bread without starting from scratch.
This easy air fryer Turkish bread recipe is worth keeping in your regular meal rotation. It is practical, customizable, beginner-friendly, and delicious enough to make homemade bread a simple part of everyday cooking.